Hands-on next level sharing data
Note: this half of the workshop we will split the participants based on their previous experience and tools they are using. If you can answer “yes” to the following questions, you are on the correct page:
- I use code to analyse my data and already know all about tidy data.
- I would like to automate my communication of workflows
- I would like to use github for version controlling my work.
Exercise B1: reflection
5-10 minutes
Go through your e-mail and look for the last time you sent some colleague or colaborator data or if all your data is shared in the cloud: the last time you uploaded new data. Suppose you move to a different university, your mailbox is closed and some stranger needs to use your data for a project. Would they have enough information to do so? What would you do differently next time?
Discuss in pairs of 2.
Introduction
Whether you are working in an experimental, computational or design oriented scientific field, data is often either the final or at least an important product of your scientific research. When working in science, we seldom work in isolation, so sharing data and being able to track mutations and versions of the data and it’s connected metadata should be an import aspect of your work. Because usually we grow into a project without having much education on very practical things such as where to store data, how to handle file structure, how to define versions of the data and how to handle mutations and version change, we decided to focus on these aspects in a very practical manner.
In this part of the workshop, we will provide you with hands-on practical handles on how to collaborate on data / projects. We will provide you with ways how to communicate on your data workflow and you will learn how to administer and track changes to your data. We will share some good practices on how to deal with sharing of data with others as well.
The contents of this part of the workshop:
- Sharing your version controlled data and code with Github.
- Sharing your data workflow, using
{mermaid}
Version control on documents and data
You may know from experience how an unnoticed change in a document, the use of the wrong version or the loss of edits can lead to loss of time invested, frustration and above all confusion! This is why keeping a record on all mutations on a document or the data is important.There usually will be quite a lot. Especially, tracking mutations on the data is important for another reason: reproducibility and validity of conclusions connected to the data.
We discussed versioning of data folders (keep current, used, data in the main /data folder, store older versions in subfolders called v1, v2 etc). But what about whole projects. Or what about if you are collaborating on a project?
Github
You will probably have heard of Git or Github. To explain why Git and GitHub are so important, let us look at an example. Suppose you are analyzing some data for your current project. You have written a script to perform the data analysis and the script is working. However, a colleague also edited the script to include some new analysis. It would be great if you could just merge your work automatically, track all changes, see if the script still works and if not, go back to the previous version of the code. Or if you could easily see the changes you made, to find out why your script stopped working.
The example shows that it is really helpful to keep track of your changes. Of course you could have made your changes in a copy of the original script. But in this way, you would end up with a lot of files on your computer and you would have to keep track of any cahnges manually. In addition, it is not easy to see what you changed. We all have been manually merging comments from 2 co-autheurs into one document before… This is why we use version control software: software that keeps track of file changes and allows you to inspect the changes and to go back to previous versions of the files.
Git is the most popular version control software used today. It is designed to track changes of text files (files you can open in a simple text editor).
However, you often want to work together with others (for example, colleagues within ONTOX) on the same documents. GitHub is a web-based platform based on the Git software. The platform allows you to create an online copy of your project folder. It is also free and allows you to store your files without anyone else having access to them (or share only with people you explicitely gave access).
However, it does more than being a backup service: it keeps track of all the changes to your project folder whenever you upload an update. It will keep track of MS Office documents as a whole “this file was changed by Alyanne on July 1, 2022”, but for plain text based files (analyses scripts in R, Python, SPSS etc, .csv files, .txt files, Markdown, Latex, etc) it will keep track of every little change that was made. If your co-author changed a sentence, you will be able to see where, when and how.
Exercise C1: version control in github: new repo
(10 minutes)
Git and Github can be used from within Rstudio, but it will take a bit more than 15 minutes to get that set up. Unless you are proficient with Rstudio already, in which case, go ahead and go to this page instead!
Here, we will use github from the web interface for this exercise.
First,go to github.com and make an account (do choose some professional account name. Don’t ask how we know that does matter.)
Now follow the github quickstart guide here (only the linked page).
Exercise C2: version control in github: commits
(5 minutes)
Working with github, your workflow will consist of a repeating pattern of a few actions:
- set up a repository
- Saving a (new) version of your files (commit and push changes). You changed reade.md in the previous exercise, but you can also just upload newer versions of a file, keeping the file name the same.
- Commit often. See it as ctrl-s. Make sure to include an informative commit message!
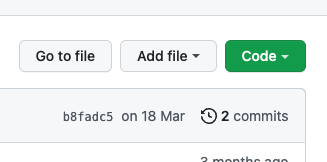
Take a look at the commits in this repo.
- What would be the benefit of keeping a change log like this?
- The short sentences in bold are the “commit messages”. What do you think should be in a usefull commit message?
- What doesn’t need to be in a commit message because github is already tracking it?
Exercise C3: version control in github: commits
(5 minutes)
Commits don’t need to be handtyped into github.com like this. You can just upload a file:
- Upload a random .csv file to your repository (upper right, click
Add file). Here is a random .csv file if you need one. - Change the .csv file on your computer and upload it again (type a useful commit message!)
- look at the history of the commits in this repo. Click around to see what is stored where.
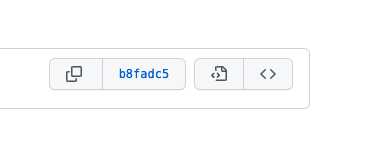
- look at the history of your csv file: click on the file, then upper right: click “history”, then click on the random code (see image below). Note that alle changes are tracked. This makes it very easy to keep track of any changes to a datafile or an analysis script, who did them and when!
Details on the choices you have to make for a new Git repository:
- Repository name field: in the repository name field you can specify the name for your new repository. GitHub will automatically check if another repository with the same name already exists.
- Public or Private: when you create a new repository, you have to indicate if you want to create a public or a private repository. A public repository can be found and downloaded by anyone on the internet (although only specified persons can contribute to the Git repository). A private repository is only accessible to persons specified by you (the owner). Although you promote reproducible research by creating a public repository, this not always possible. Especially if you are employed (or doing an internship!) at a company or other agency, your employer often does not allow you to make your files public. Always check with your employer (or supervisor) to see what is allowed. Choose a private repository if you are not sure!
- Initialization files: when you create a repository, you can create some ‘initialization files’. These files include a README file, a gitignore file and a license:
- README file: a README file is a file that contains information about the repository. This file should be read by everyone that is planning to use the files in the repository. It usually contains information about the content of the Git repository. You can create the README file when creating the Git repository, but you can also do it later.
- gitignore file: we will explain the purpose of the gitignore file in detail below. In short, the gitignore file contains all the file names of files that should not be tracked by Git. That means that you cannot commit changes to files that are in the gitignore file. On GitHub, you can easily create a gitignore file that is specific for the programming language you are using. It is therefore recommended to create a gitignore file (for example for R) when creating the Git repository.
- License: when you create a public repository, it is important to add a license to your repository. The license states what others can do with the files in the Git repository. For example, with an MIT license, you allow others to use your file for any purpose they like (even for commercial applications). Similarly, if you want to use the files of others, it is important to check their license to see what you can and cannot do. Please check the resources for more information about licenses.
Data flows in ONTOX
ONTOX is a data intensive project. Meaning, there is a lot of data collection going on in the project. With so many people collecting data, there is an eminent need for a good protocol. Usually data collection protocols are indicated as workflows which are described as flow diagrams.
To create a workflow, there is a lot of available software. You could use e.g. Lucidchart or Microsoft Visio. These software solutions are easy to use, but have one disadvantage: They use a Graphical User Interface. As explained previously, GUIs prevent recording of steps and are in that sense not compatible with Reproducible Research. That is why we will use another tool ‘Mermaid’ to create our workflow. To learn more about Mermaid, follow this link. The Mermaid syntax is easy to follow and can be implemented in Markdown. The good thing is that Github supports Mermaid natively, meaning that you do not need any additional steps to visualize Mermaid flow diagrams in Github.
Exercise C4: Understanding data workflows with Mermaid
(5-10 minutes)
For starters we can look at an example workflow that is used within ONTOX by looking at the source file in Github.
Study the source file of the ONTOX workflow that is called LiteraturToAOP here. To see the source, click on the raw button on the top right corner of the file. Try to answer the following questions:
- What defines the relationship between two elements in the workflow?
- How do you create a box?
- How do you create a ‘database’ element?
- How do you put text on an arrow (relationship?)
- How do you define a circle in the workflow
- What do you need to do to get more relationships pointing TO a box?
- What do you need to do to get more relationsships pointing FROM a box?
Create your own workflow
When collecting or generating data in research, it is good practice to make the process by which data is collected, processed, stored and analysed, visualized and results reported explicit in a workflow. In the exercise below you will start to create a workflow for your own work.
Exercise C5: Creating your own workflow
(20-30 minutes)
In the previous exercise on Github you created a test repository in your own Github account. Here you will create a very simple mermaid graph that applies to an element of data collection in your own work
- Take a piece of paper and start drawing a simple flow diagram on an element of your data collection that applies to your daily work as a scientist. Limit yourself to a maximum of five elements in your graph.
- Create a repo in your Github account called
my_mermaid - Add one file to this repo called
workflow.md - Try recreating the graph you have drawn on paper in this Markdown file
Note: Mind that mermaid graphs are automatically rendered in Github, when stored as code in a Markdown file. To indicate that the code in the file is a mermaid flow diagram you need to add a special start and end line to the beginning and end of your mermaid graph:
Add
```mermaid
to the start of your file.
When you want to end the definition of the flow diagram, close the mermaid fragment with:
```
answer the following questions:
- Will your research materials be edited or transformed between the time that you collect them and the time you publish them in your thesis or dissertation? If so, is it important to save the intermediate versions? What conventions might you use to track the versions?
- Do you expect to combine multiple files into a single file (e.g., editing multiple clips into a single video)? If so, how do you plan to manage the relationships between the original objects and the combined object (e.g., naming conventions, folder context, readme files, etc.)?
Discuss the issues you see within the breakout room, and plan 1 morning in your agenda in the next month to build a plan to tackle them. Then, stick to the plan!